Friday, October 14, 2011

Project Sneak Peek


I ventured out of the house this week to check in on my 1920s restoration, that I've talked about frequently on here, and just had to show you a sneak peek of the awesome pool cabana. We created an amazing space out of what was basically a tool shed. I can't wait to show you the full space. I designed a vintage space but wanted to mix in a few modern elements like the chairs above, which I love!!! They are also durable for damp swimsuit hineys :-)

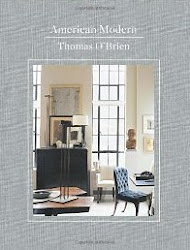
I'll save the in depth detail for the full post but here is the kitchenette area adorned with some gorgeous Thomas O'Brien Milton Road pendants...love.
Imperial Trellis, shiplap walls and beadboard on the ceiling...double love!

There was a stone wall where these doors are now. It will be fun to show you the completed space as the before and afters are beyond dramatic!

And another little sneak peek just for fun...
Remember this bathroom that I've shown peeks of before? It will be ready to show you soon too :-) It is stunning y'all!

Sorry for the crumby camera phone snaps. There will be better pics for the actual posts, promise.
I hope you had a great week! It's the weekend, yay!

Tuesday, October 11, 2011

My Nursery Journal: Part V

Well, as you have seen our girl is here :-) The nursery hardly seems relevant now, we are so consumed with her, but since this is a design blog I thought I would continue to share her sweet little space :-) If you missed them, check out Part I, II, III & IV.
I am in love with the bedding. I had everything custom made at my workroom and I couldn't be happier with the finished product! I went ahead and had bumper pads made even though they won't be in the crib 90% of the time. I just really wanted them and eventually, when my girl is big enough, I will likely keep them in. I had them made in 2 sections so that when we convert the crib into a toddler bed, the front bumper will come off and the back section will fit like a daybed. I made them in washable cream linen corded in khaki and cream seersucker that can be unzipped from the pillows and thrown in the washer. The bed skirt is also adjustable so that it can be moved up and down with the bed as she grows.
As you can see in the first image, we painted the crib gold, a la Erika Powell style :-) It ended up being kind of an ordeal, which if my husband were writing this would be his description for all of my "projects" for him. Long story short, after several attempts at brushing, spraying etc. and several expensive cans of paint later, we ended up taking it up to Beck Industrial to be professional sprayed in their paint booth, sheesh! Let's just not talk about it anymore, ok?
In spite of everything it turned out beautifully!!! Thanks babe!...isn't he cute putting the crib together?!
All of my fabrics are F. Schumacher.
For the art above the crib, I bought these vintage Alice in Wonderland images at an Etsy shop and framed them in some stock frames I found at Stein Mart. The frames had some cheesy palm frond prints in them, but I loved the frames and the color of cream on the mattes, and so it was an easy switch out for the look of custom framed art...which can cost a small fortune.
These cute little metal bugs were part of the decorations for one of my showers. I just grabbed some branches from my yard and stuck them on the branches in a vase. I'm aware that this is not toddler-proof but we have a while before that ;-) The little glass table next to the glider will have to go, when that day comes, as well.
We kept the queen bed that was in the room when it was a guest room. We figured it would come in handy for the nights that I sleep in there and then eventually it will likely be her 'big girl bed'. That is hard to even imagine right now!
I did a little art collage over the bed that I plan on adding some other pieces to. The owl watercolor was a gift from a sweet client. The top piece is another vintage Alice in Wonderland scene of the Mad Hatter's Tea Party, and the Asian silk piece below it was Frank's grandmother's in it's original tortoise shell frame. I love this!

The headboard was actually something that I made from the old crusty shutters that were on the windows when we bought our house. They were very shabby and not in the chic kind of way. I took them apart and then screwed the pieces together using the old hinges. A little wood glue and paint and I think it makes a pretty cute headboard...kind of Somerset Bay-ish.
Here is what the shutters looked like before. Many of the slats were broken and they had been poorly painted several times. Plus they were just really old. I love a little patina but these were just kind of gross.
The room is finally done so I'll show you some full room shots when I get a chance to fluff it up a little. The past few weeks have been crazy with our new little one at home. This motherhood business is no joke! Props to all of you mommas out there!!!
By the way...
Have you seen our amazing newborn photos? I absolutely adore our photographer! She is a personal friend and I highly recommend her if you are looking for a creative and extremely talented photographer. Check out her sweet post about the little Miss :-)
I hope you're having a great week!